Setting Up a New Country on Free Stuff World
Launching a new country on Free Stuff World mostly comes down to two things: creating the category page, then using Country Manager (Tools → Country Manager) to handle ISO codes, mobile category linking, offer assignment, and menu placement from one screen.
This guide walks through the process end to end.
1. Create the Country Category Page
Before anything else, you need the core WordPress category for the country (e.g. Free Samples in Portugal). This has always been required and hasn't changed.
Create the category page here. Give it a detailed description and set the SEO meta tags, following the existing SEO/meta tag guides. It's worth looking at a few existing category pages first to get a feel for the content and bottom description style used across the site.
For the slug, keep it neat and simple — the page name can be more descriptive (e.g. Free Samples in Portugal), but the slug should just be the country name in lower case, e.g. portugal. Also add the ISO country code, e.g. PT for Portugal. A full list of 2-letter ISO country codes is available here.
Once the category exists, everything else below is done through Country Manager.
2. Open Country Manager
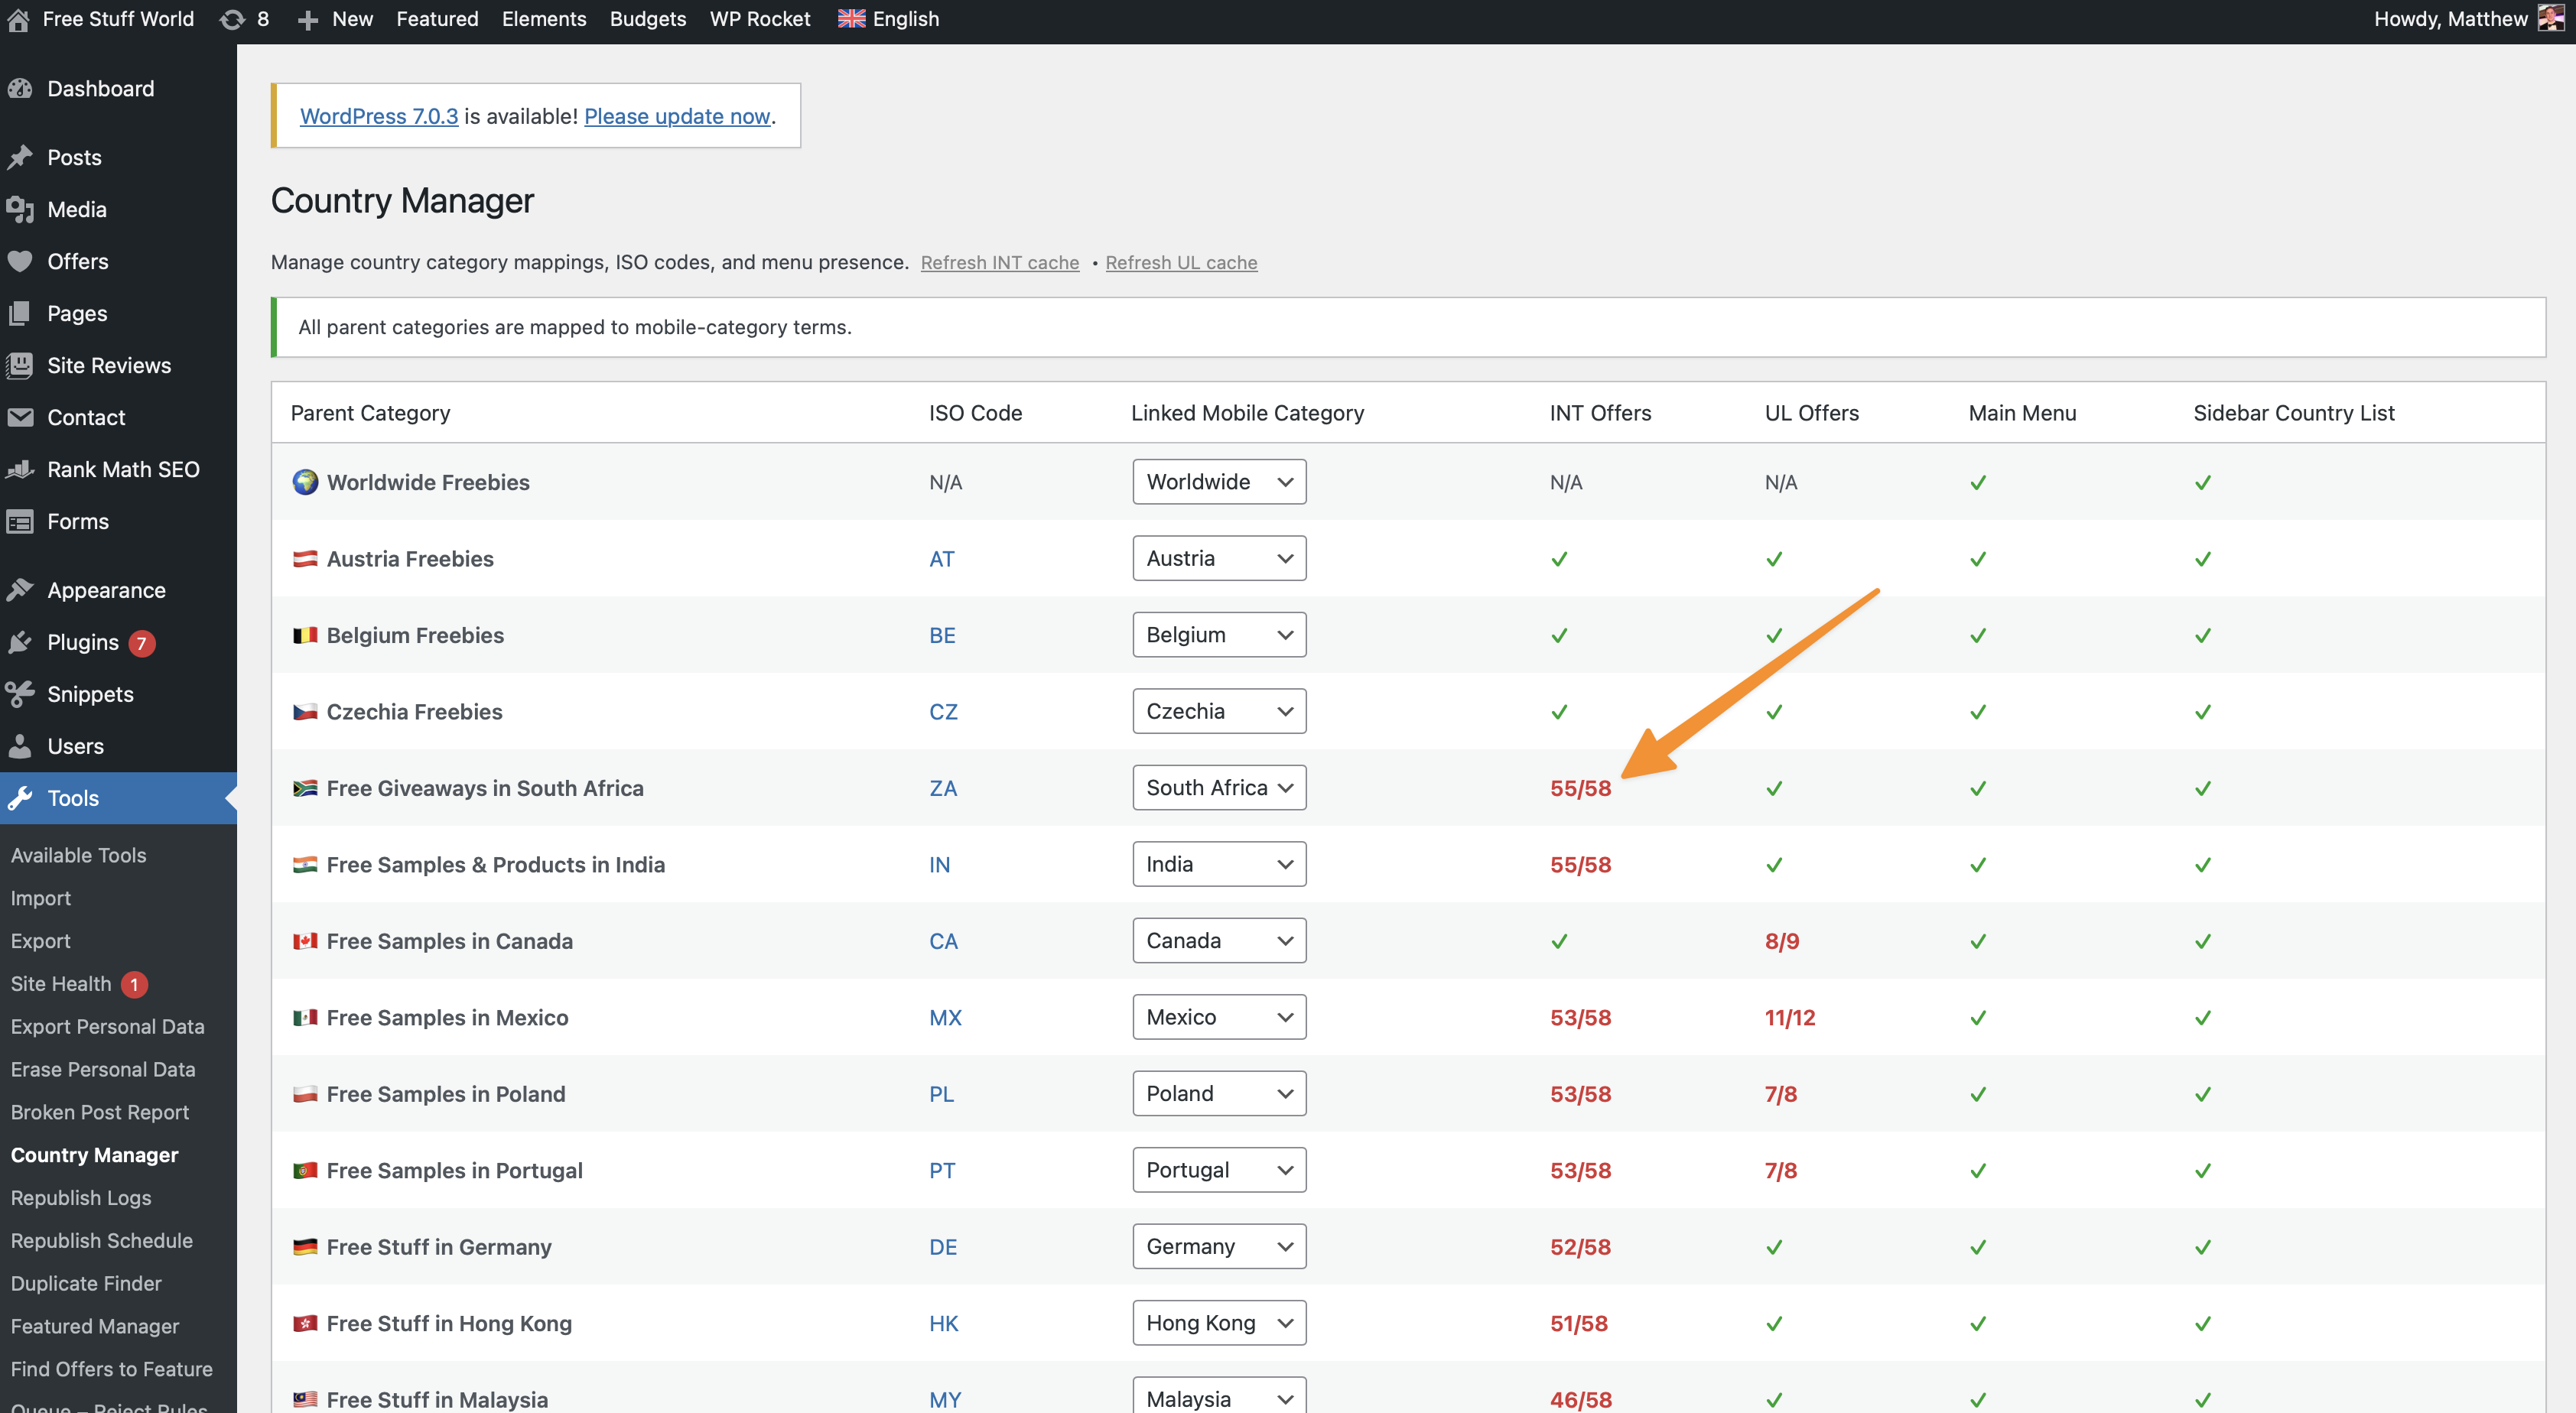
Go to Tools → Country Manager in the WordPress admin. This lists every parent country category alongside:
- ISO Code
- Linked Mobile Category
- INT Offers (worldwide offer assignment)
- UL Offers (universal-link offer assignment)
- Main Menu / Sidebar Country List presence
New countries show up here as soon as the category exists, flagged in red until each part is completed.
3. Set the ISO Code
In the row for your new country, click the ISO Code cell (it will show "Missing" in red if not set yet).
Type in the two-letter country code (e.g. PT for Portugal — Google "[country] two-letter country code" if you're not sure) and click Save.
4. Create & Link the Mobile Category
Still in the same row, use the Linked Mobile Category dropdown:
- If a matching mobile category already exists, select it.
- If not, click Create & Link — this creates the mobile category automatically (using the same name) and links it to the parent category in one step.
Create & Link defaults to using the same name as the parent category, so check the name before confirming and tidy it up if needed. Mobile categories should just be the plain country name — e.g. Portugal, not Free Samples in Portugal or Freebies in Portugal.
Once linked, this mapping is what drives everything else — including automatically tagging offers with the right mobile category when they're saved.
5. Assign Existing Offers to the Country
Country Manager tracks and makes it easy to add two types of offers for each country:
- INT Offers — worldwide offers that may apply to every country
- UL Offers — universal-link offers (from WMAT network) that are only live in specific countries but may be live in the new country you have setup.
Click the number/status in either column (e.g. 7/8) to open a modal listing the relevant offers. From there you can tick which ones apply to the new country without leaving the page. A green tick means everything relevant has already been resolved for that country.
As a rule of thumb: if an offer is in Worldwide Freebies, it's usually available everywhere — but always check the offer notes/landing pages first, since some (particularly UL offers) are only live in select countries.
6. Add the Category to Site Menus
The Main Menu and Sidebar Country List columns show whether the category is currently present in each monitored WordPress menu.
- A green tick means it's already there.
- A red cross is a direct link — click it to jump straight to that menu in Appearance → Menus and add the category.
Summary
- Create the country's category page (if not already done).
- Open Tools → Country Manager.
- Set the ISO code.
- Create & link the mobile category.
- Assign relevant INT and UL offers to the country.
- Add the category to the Main Menu / Sidebar Country List if missing.